The side trade for last month, (yes I am late again) was a prayer flag. I had never done one before and stupidly went searching on the internet for examples. Well there are some beautiful examples out there and before I knew it, I was too intimidated to try. That's not entirely true. I did start but forgot what direction I was going with it and stopped. I stopped for the whole month! Deadlines are wonderful motivators to finish things off. That and school starting, a new job and less time.
The piece started with a dark painted background in indigo and burgundy. I decided it needed some more lively colors and added in lemon yellow, hot pink, lime green and sky blue. There was quite a bit of paint on that so I scratched in the words peace, hope, love and prosperity. I think that covers the bulk of prayers. I added in a metallic burgundy heart at the top but didn't want it so cutesy and added in some dark blue to add dimension. I also added additional burgundy into the background of the flags for more interest. The only thing I did wrong with this was not to make one for myself. I guess this means I have to try it again.
Showing posts with label hand painted. Show all posts
Monday, September 2, 2013
Thursday, July 11, 2013
I think I have a problem!
One of the side trades in our group was to do a 6" x 6" mixed media piece which included hand stitching. The inspiration came from the challenge posted in Cloth, Paper, Scissors magazine. If we love what we made, then we could in turn, enter it into the challenge.
I was not prepared for how much I would love the size! I have finished four and have another four more in the works!
This one was inspired by all the rain we have had. At the end of my driveway is a small hole that fills with water whenever it rains. I noticed a leaf at the bottom and was intrigued to recreate it. I drew the shape of the puddle first and using tissue paper and gel medium, I created a rock texture around the hole. After it was dry, I used various acrylic paint colors to get the color I wanted. The bottom of the water was painted in dark blue with a wash of brown over it. The leaf was created from a cotton face pad. Did you know you can dye them?!! I have a bunch so cut out a leaf shape and using my sewing machine, I sewed veins. I actually hated the top side and flipped it over. This was much better. A few beads and then dimensional magic by Modge Podge created the water. I love this stuff! I hand sewed a few leaf shape beads on top for the complete finish.
Was playing around with sketching on canvas for this one. Then I was coloring it with oil pastels. You know that point where you hate what you are doing so you cover it up?! Don't lie. OK go ahead. Well I hated it and painted over it with white acrylic paint. Don't you love crazy things like that? I loved the look because some of what I had was still peeking through! So back in with pencil and oil pastels. I loved how it looked! Yes her eyes look cross eyed and one is bigger than the other, but the technique was very cool. I will be trying it again.
So my sister thinks this is creepy because she is green. Well that's because she is a mermaid! In my world, mermaids are green! I sketched her out on the canvas and well yes she is disproportionate too. Try drawing on untreated canvas. Not so easy. I painted her with fabric paints and then sewed in details on my machine. Her eyebrows look like small caterpillars but I still like them. In face reading, big eyebrows indicate intelligence! So she's smart! I added more details with fabric markers and then added dimensional magic all the way around her face. When it dried, I added in rings of the dimensional magic. After that was dried, I used interference blue paint on top and dark blue markers around the edges to create ripples of water. Is she looking up from the water or down at her reflection?
This was actually the first one I made. It was a bit like my ATC I created. This is actually canvas, thin batting and then brown fabric on top. I free motion quilted the rocks and sand. Then using sheer fabrics in brown and blue, I sewed them down to make waves. Using fabric paint, I added details into the rocks and created a sandy section using sand gel medium. Fabric paints finished off the sand. The waves were touched with the interference blue. I wanted to created water sloshing up onto the shore and used, you guessed it, dimensional magic! Interfence paint was applied to the edges of the water waves.
So those are my first four attempts. Stay tuned as more are coming!
Labels:
6"x6",
art,
art quilts,
dimensional magic,
dyed,
embellished,
fabric,
hand painted,
mixed media,
stone,
water
Monday, April 1, 2013
Sky ATC-Reflections
The sky is one of my favorite things in the world. But when it came to this trade, I was kind of stuck. I guess I had too many ideas of which way to go, that I just couldn't pick one. Inspiration struck one morning as I was walking out to my car, on my way to work. It had rained and a puddle of water was in the street. I saw the reflection of the sky and trees and well, that was my idea. The execution was a little more difficult.
Digging through my fabrics, The perfect fabric presented itself. A batik in mainly white with blues, greens and golds running through it. I stamped the fabric with a tree stamp I had on hand using a purple ink. Once dry, the background was painted in using a light gray acrylic. The fabric part was then given two coats of glossy accents, with a few drops around on the "pavement". It was kind of boring, so I added in a purple ink around the water to make it pop more.
It was still boring and needed a pop of color. So back to my drawer of odds and ends, yielded these paper leaves. I added them using the glossy accents and it gave another layer of interest to the design. The edges were finished off using a copper shiva paintstik.
Happy Spring Everyone! We are still waiting for it to "spring" here!
Labels:
art,
ATC's,
fabric,
fiber,
glossy accents,
hand painted,
shiva paintstiks,
stamps,
trees,
water
Monday, December 31, 2012
Gustavo, Georgie and Fib
I finally finished this piece and named it after my daughters three African fighting frogs. This piece has been in the works for over two years. I would get excited about it, work diligently and then hate it. So it would be put away until I would find it again while looking for something else. Up on the design wall, critique and then figure out what was going wrong with it. The last round was the fact I needed something in my underwater landscape. Enter the frogs.
I really love how this finally turned out. There are so many design techniques and materials that went into this that my hand would go numb typing them up for this post. Let's just say I am extremely happy with the results! Maybe I will enter it into the Celebrate Spring call for entries.
On to my next adventures. My one goal for 2013 is to finally put together a website. Another goal is to start entering my pieces into shows. I need to get back to art again.
| Closeup of one frog |
| Here is another closeup |
| Final finished piece |
On to my next adventures. My one goal for 2013 is to finally put together a website. Another goal is to start entering my pieces into shows. I need to get back to art again.
Labels:
art,
art quilt,
beaded,
colored pencils,
dyed,
embellished,
fabric,
fiber,
frog,
hand dyes,
hand painted,
hand quilted,
ink,
mixed media,
snow dyes,
water,
water color crayons
Friday, August 17, 2012
Sneak Peek
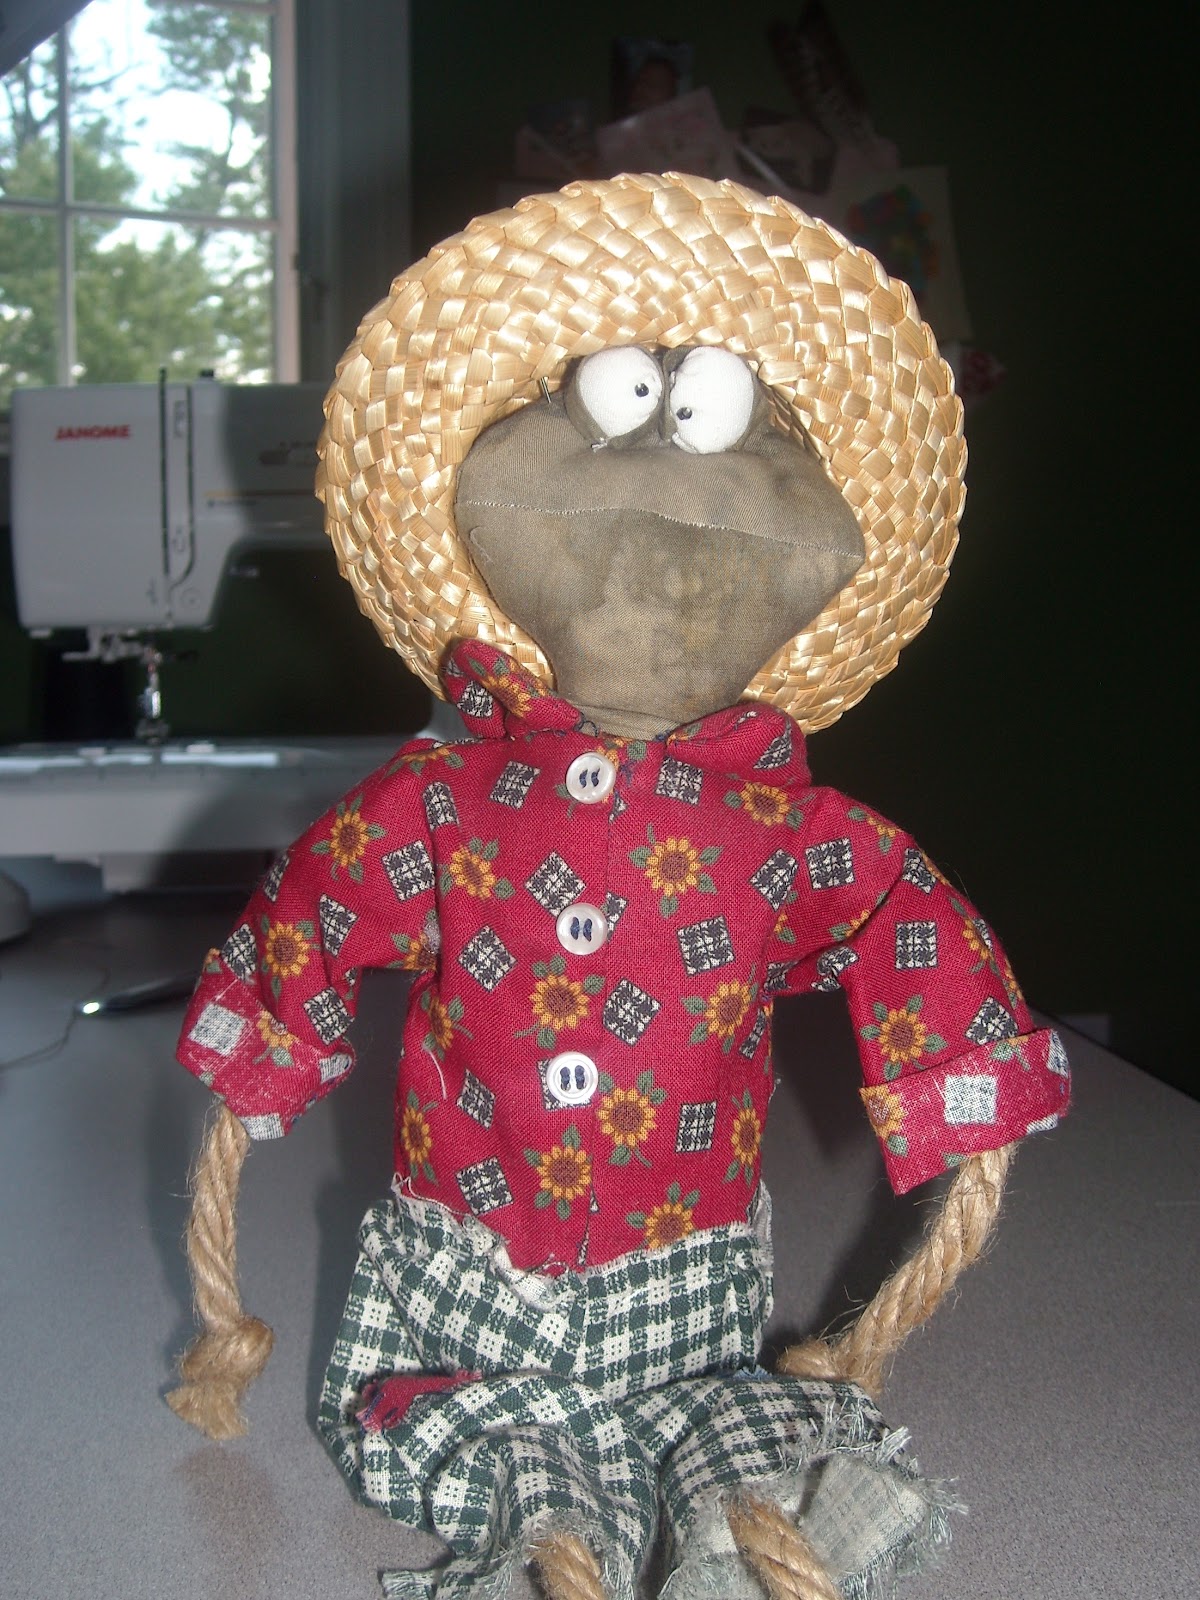
Not sure what is going on with me this week, but frogs have definitely been a mainstay in my creations this week. They are rather cute. This guy was from a pattern I bought a long time ago, started but never finished. It was supposed to be a present for my sister who is crazy for frogs. So if she wants this guy, she is going to have to come for a visit to get it! Ha ha!
He has a mate which is started. Should be another 10 years before I finish her though! Well maybe I can get it done by Christmas.
As a participant in a quilt art blog hop, I am submitting my current work in progress. To check out everyone else participating hop on over to Nina Marie's site
My last frog is actually a set of frogs. I pulled out a piece I had been working and and was in love with. Suddenly, after viewing it hanging up, I hated it. I pulled it off the design wall and buried it like I always do. When I get stuck on a project, I find that stepping away from it for a while will help me gain some perspective. This time it worked. I realized I did not have enough contrast and set about adding in more colors along with the contrast. I was happy when done but it was still missing something. Walking by my daughters african fighting frogs made me realize that was what was needed.
In second grade they learned about the life cycle of a frog and grew them into tiny little frogs. Once the unit was done, the kids were allowed to take some home. They were the size of a thumbnail. We took three which she promptly named Georgie, Gustavo and Fib. They are now the size of a large fist and need a bigger tank!
I spent an evening sketching the little guys. (I say evening because they move around quite a bit.) Once satisfied with the sketches, I traced them on some heavy vellum, cut them out and used it as a template to trace onto a greenish batik. The frogs have spots all over and I wanted a dimensional look, so I put a piece of batting underneath the frogs and free motion quilted around to create the patterning. Colors for the spots where done with fabric markers. The final part was to applique it onto the quilt. Just before sewing it closed, I added some stuffing inside to really pop them off the quilt.
I am loving this piece. I am finally ready to square up and finish it off! It feels so good to create something I love again!
He has a mate which is started. Should be another 10 years before I finish her though! Well maybe I can get it done by Christmas.
As a participant in a quilt art blog hop, I am submitting my current work in progress. To check out everyone else participating hop on over to Nina Marie's site
My last frog is actually a set of frogs. I pulled out a piece I had been working and and was in love with. Suddenly, after viewing it hanging up, I hated it. I pulled it off the design wall and buried it like I always do. When I get stuck on a project, I find that stepping away from it for a while will help me gain some perspective. This time it worked. I realized I did not have enough contrast and set about adding in more colors along with the contrast. I was happy when done but it was still missing something. Walking by my daughters african fighting frogs made me realize that was what was needed.
In second grade they learned about the life cycle of a frog and grew them into tiny little frogs. Once the unit was done, the kids were allowed to take some home. They were the size of a thumbnail. We took three which she promptly named Georgie, Gustavo and Fib. They are now the size of a large fist and need a bigger tank!
I am loving this piece. I am finally ready to square up and finish it off! It feels so good to create something I love again!
Labels:
art,
art quilt,
daughter,
dyed,
embellished,
fabric,
fiber,
frog,
hand dyes,
hand painted,
hand quilted,
ink,
water color crayons
Tuesday, August 14, 2012
Cucumber ATC trade - Cool As . . .
I decided on this little guy because the theme being cucumber meant that you could use all the colors in a cucumber which includes the orange flower! This project started with a sketch of the frog. I used acrylic paint to add color but it was too flat and needed some dimension and texture. I added details using colored pencils. Still kind of flat looking.
Referring back to pictures of the frog, I realized he was kind of shiny. Light bulb moment meant time for the glossy accent! I am glad I bought another bottle. I really love playing with this product! Looking good but still lacking the skin texture. That was solved while digging through my fabric markers for another project (which also includes frogs!) and I found my Puffy Velvet Pen! I haven't used this in a long time and it is supposed to be for fabric. Well rules are for breaking sometimes and I colored in the top half of mr. frog with it. It dried quickly. I love not having to wait. Hit it with a heat gun and wow! I nice rubbery type of texture. But what about the bumpy texture. So I added some dots all over the top and hit it with the heat gun again. Oh yeah!
Here is a side view to help explain what it looked like. Bet you want to reach out and touch it!
It rained all day yesterday so my cards bowed. Sigh.
Labels:
ATC's,
colored pencils,
frog,
glossy accents,
hand painted,
puffy velvet pen
Monday, April 30, 2012
Kids Drawings
Did you ever look at one of your child's drawings and think that it would make a cute stuffed "animal"? I have on more than one occasion and saved many of my daughters drawings on the idea that I would eventually do that. Well time never permitted. (My son didn't really like drawing much) A few weeks ago, this little girl Abigail brought in a drawing to show me. It was so darned cute and I asked if it was for me. Well in normal Abigail fashion she immediately said no! she was giving it to Miss Keri. She promptly brought it over to Keri and she hung it up. I kept seeing it each day and thinking how cute that would look as a stuffed whatever it was. I snuck it out of the school on Friday!
As you can see, the piece was a quick drawing in black marker on newsprint. I took creative liberties and added some color to my final project.
The body was red felt and I gave it purple hair. The eyes were black fabric fused onto the felt and then hand sewn in place. I embroidered the eyelashes and mouth. The white parts of the eyes were created with white fabric paint. Of course I showed this to my daughter who immediately asked for it. I told her no and then she wailed on about how I made stuff for other people and never for her blah, blah, blah. So I guess it's time to hunt down those pics I saved of her art and create them in fabric to stop the whining. LOL
| The original drawing! So cute! |
| Looks great in color! |
| Side by side comparison |
Tuesday, March 20, 2012
Sketch to Art Quilt
When I saw the challenge in the Quilting Arts Magazine, I felt compelled to create something. I had done a zentangle sketch and used elements from the peacock to fill in the different areas. It was so cool the way it turned out and I thought it would make a great quilt and look good in color!
This was the sketch I started out using as my idea. I made photocopies of it and experimented with different color combinations.
I sketched the design on white cotton fabric and filled in the areas using, paints, dyes and dye pens.
I free motion stitched in black thread in most areas and hand stitched the smaller areas. Unfortunately it did not make the cut for the challenge. Oh well. I loved doing it! Actually, I loved this so much, that I have started a much larger version of this piece but a few color changes. Can't wait to work on it!
Labels:
art,
fabric,
fiber,
hand painted,
hand quilted,
sketch
Sunday, January 29, 2012
ATC - Red
This year the group is going to do colors for the trades each month. Red is the color for February - how appropriate. My piece is titled PASSION which red always seems to signal to me.
I stamped all over my batik fabric scrap (which was in shades of red, orange and brown) with a handmade stamp. The stamp reminds me of something inside our brain that is all connected. When dry, I placed a red mesh fabric from a floral arrangement, over the entire piece and free motion quilted around the stamp and filled in with different sized circles using black thread. I cut them apart and added Glossy Accents onto the stamped parts to bring out the red. I think this may be one of my favorites! I loved out it turned out.
Don't forget to check out all the others at http://artsinthecards.blogspot.com
Wednesday, December 28, 2011
Faux Wood Doors

Every once in a while, I get calls to do some faux finishing. In a past life, I used to do it for a living but life gets in the way and the kids were small so it had to go to the wayside. A neighbor down the block saw my house and asked me to do some work in her house - a faux brick wall! Then a faux stone wall. They in turn had a party this past winter and a friend of theirs saw the work and fell in love. So when her office wanted to redo their meeting room, she remembered me. The job was to take the metal doors and paint them on one side to look like the wood floors and crown molding. Here are the before and after shots, I will let you decide if they turned out.
Sunday, May 1, 2011
Sacred Threads - Accepted!!
I got the news last weekend that one of my pieces was accepted to Sacred Threads!!! So exciting! After a slew of rejections, this one finally got the proverbial high 5!!
My piece is for the area of spirituality. I named it "In The Silence I Have Seen Him." I had done this for the black and white challenge but wasn't done in time for last entry into Sacred Threads so I had to wait until now to try. This was a whole piece white fabric and I sketched on the angel with pencil. I worked in layers using black setacolor and aloe vera gel to get the saturation and different layers of gray. Then "sketched" the details using my sewing machine. I went in with shiva paintstiks in white and black to add details and additional shading. I love this piece and hope others will too.
Labels:
art quilts,
fabric,
fiber,
hand painted,
shiva paintstiks
Friday, March 18, 2011
ATC Super Moon
This is sad. I am only posting about the ATC's I'm making! I have been doing other stuff but can't post as I am busy trying to send pieces in to shows. I am actually being brave and answering calls for entries. I will keep you posted.
So this challenge is using the color Indigo! Oooooo!!!! I love indigo. It is so dark, moody and mysterious. Everyone has been talking about the super moon coming up on March 19th and I knew my theme was set. First I found some woven fabric in indigo with a faint shot of gold. I added in wavy lines with my sewing machine to create the snowy landscape. Next was a free motion stitched tree and a moon using black puffy paint. Why black you ask? Well, once you paint over the black with white, some of the black will come through as grey creating the surface of the moon coloring. Well it does in my mind and doesn't show up as well in my photos. Finally, I added white and blue to the ground using shiva paintstiks and blended. Then I decided to add in some clouds behind the moon and used white, blue and a touch of black and blended for a muted background. I am very happy with how these turned out.
Labels:
art,
art quilt,
ATC's,
fabric,
hand painted,
shiva paintstiks,
trees
Wednesday, February 2, 2011
Lily Pads - Creative Combo
Finally finished my next challenge. I never seem to be able to create something quickly. It always has to be a ton of different materials and ideas rolled into one. Oh well. Check here for all the other creative combo cards made for the challenge http://artsinthecards.blogspot.com/
Can you tell I am longing for spring with this one? My creative combo was the use of cotton fabric and inks. Of course I did add in interference blue medium, and threads and sequins.
Labels:
art,
ATC's,
embellished,
fabric,
fiber,
flowers,
hand painted
Monday, January 24, 2011
The sketchbook challenge
I have been sketching, I just haven't been taking pictures and uploading. I have to do things when I have a moment of free time here and there. So I am doing uploads and such at the moment with this free time. I have posted these to the Highly Prized flickr group already. Not sure if the tag worked but will see!
I posted two sketches already and here are the rest. I decided to try a zentangle. Wasn't sure what it was so I goggled it and found some examples and a quick tutorial which I can't find again. Sorry. This was great fun to do since I had time to kill while waiting for the kids at swim practice. Putting them on the swim team has forced me to have to find things to do to fill my time while waiting and I have found more time for art so this is a definite bonus. Anyway, this one was the theme of peacock of course:

The rest were sketches of some underwater sponges, corals etc. Not exact but for shape and color. I have this piece that I have been working slowly on for over a year and these will make great reference photos.


I posted two sketches already and here are the rest. I decided to try a zentangle. Wasn't sure what it was so I goggled it and found some examples and a quick tutorial which I can't find again. Sorry. This was great fun to do since I had time to kill while waiting for the kids at swim practice. Putting them on the swim team has forced me to have to find things to do to fill my time while waiting and I have found more time for art so this is a definite bonus. Anyway, this one was the theme of peacock of course:
The rest were sketches of some underwater sponges, corals etc. Not exact but for shape and color. I have this piece that I have been working slowly on for over a year and these will make great reference photos.
Labels:
art,
hand painted,
mixed media,
sketchbook challenge,
watercolor crayons
Monday, December 27, 2010
Faux bricks
I found the photos on my iPad. I hadn't transferred them over to my main computer. This was a really big project and took far longer than I had planned. It' s been a while since I've done a project this big.
My neighbors wanted to do a faux brick wall in their formal living room. The side wall was about ten feet and sloped down to eight. The back wall was ten feet high and I don't want to know the width. This technique is sponged on in four colors. The first takes the longest as it has to cover almost all the wall. The next two are time consuming and the final is a breeze as you just hit a few areas. The hardest part was measuring out the bricks and keeping them level and the right size. The process is a little forgiving. Finally, outline each of the bricks in the mortar color and then highlight and shadow each brick. I was exhausted when done but what an awesome looking wall if I do say so myself!
Faux Stone Wall
So I have been back to doing a little faux finishing - this time for a neighbor. I did a brick wall a few months back and will have to upload the photos when I find them! But they were having a party for the holidays and the whole house was being painted and cleaned so they wanted to know if I could slip in and paint this wall in the middle of all the chaos. Sure, why not! I took a few quick shots right after it was finished and could only do the top part of the wall because they had all their stuff in the room I was painting.
I will try to get another full shot later when they have a few moments. There is an elk head that actually hangs on the wall. This should make a very nice backdrop for him.
Thursday, December 23, 2010
Trashin' the Mailman ATC
Our latest trade was to use the junk mail that we receive and create some ATC's. This gave me a chance to try out a cool new technique for image transfer. Take a color brochure and place packing tape over the image. Overlap if you need to. Then rub the whole image to make sure you get a good print. Once that is done, flip over to the backside, run some sandpaper over it to rough up the surface, then use water to remove the paper backing. This will leave you with a print of the image on the packing tape.
I glued this to watercolor paper that had been painted in pinks, blues and purples to match the colors from the brochures. I used gel medium to adhere it. I then pounced some interference blue over the fronts, then stamped with tiny snowflakes in dark blue. Once that was dry, I added another stamp in white in a random pattern and outlined in dark blue marker.
For the big snowflake, I cut out 2 snowflakes from the brochure and then made photocopies in a larger size. I made extras in case I screwed up ; )
I used glitter glue on top of the snowflakes to make them sparkle then cut each one out when the glue dried. I glued one to each card and added Holiday 2010 from another brochure.
Finally I added eyelets and funky yarn to frame the entire piece. They were hard to photograph as they are very shiney.
Check out our ATC blog to see all the other pieces for this challenge:
http://artsinthecards.blogspot.com/
Labels:
art,
ATC's,
embellished,
hand painted,
mixed media,
stamps
Saturday, December 4, 2010
Typography
Our latest ATC trade was called Typography. We had to incorporate type or letters in any way, shape or form. Of course I immediately decided to use PCOX for my project. It was perfect!
I used watercolor paper and stamped the letters with embossing liquid for the p's and o's and then sprinkled on glitter emobssing powder. Once it was dry, I hit it with a heat gun. The sparkles stayed! Then I stamped c's for the eyes in the peacock feathers and x's were used to create the feet. I painted the feathers with metallic acrylic paints and drew in final details with a black pen. Some of the glitter went on the feet so I am just saying it was nail polish! LOL
Sunday, October 17, 2010
Florida Flora
I can't believe I haven't posted anything since end of August. So sad but I have been busy. Well busy with my kids going back to school, going back to work, my kids various social engagements and soccer season. But I did manage to get a piece done and entered into the Road to California show.


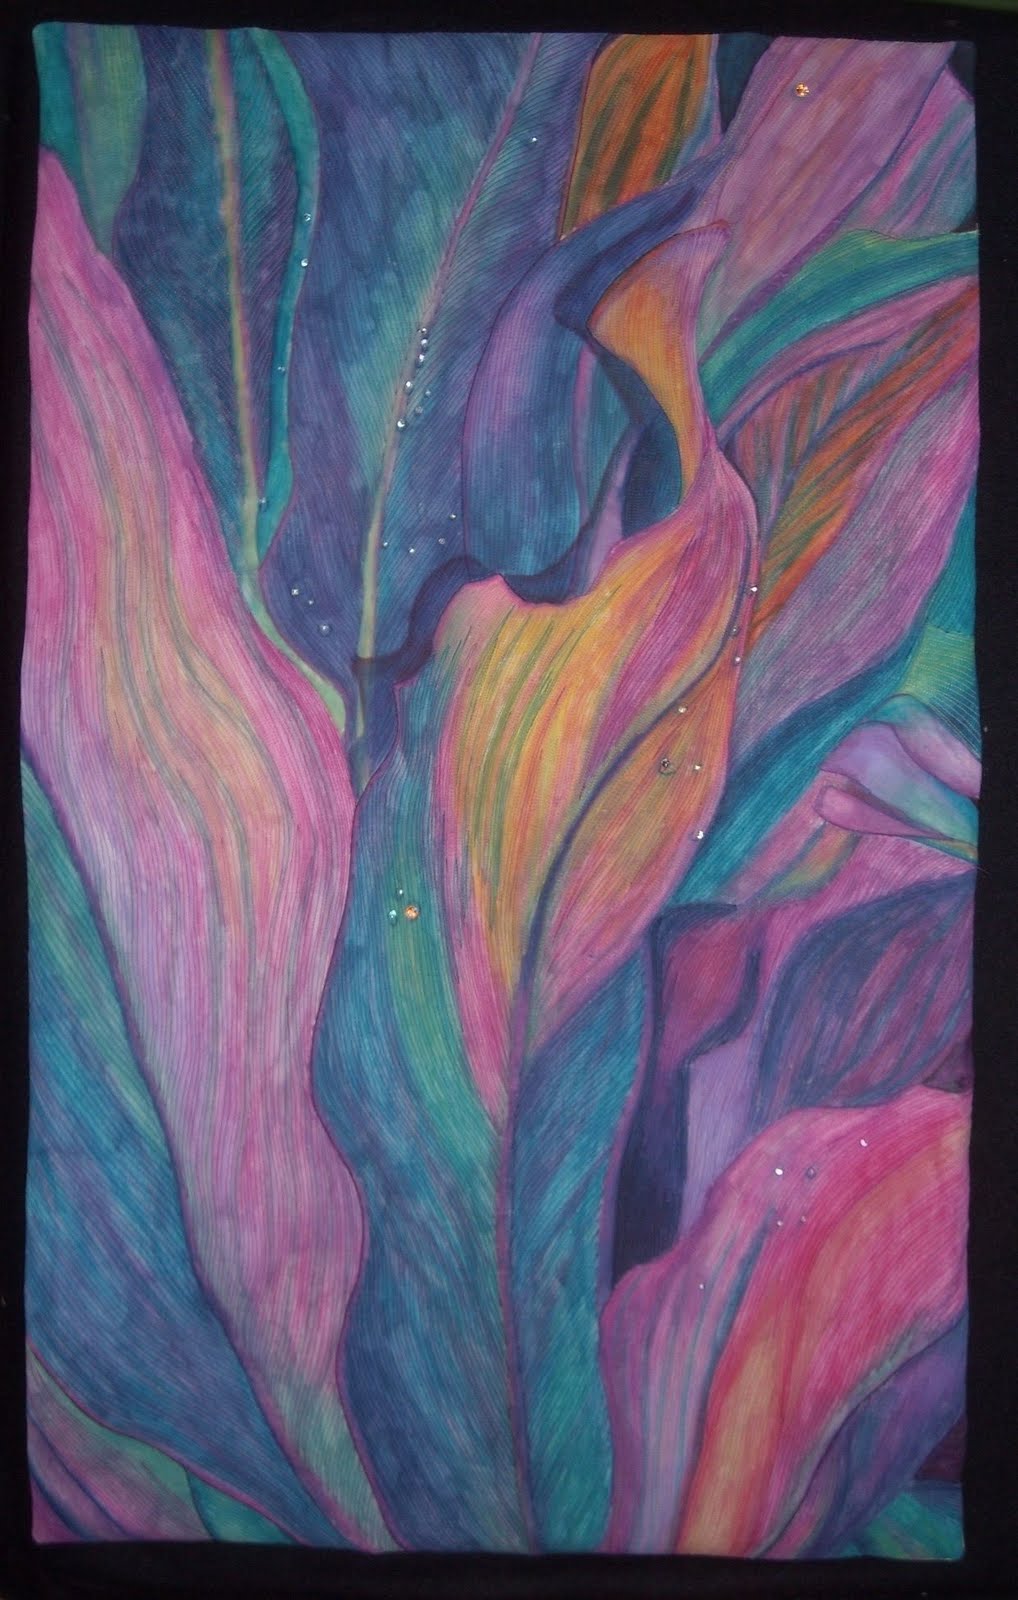
I started out using a photo I took while on vacation in Florida last year. I sketched out the picture using Neocolor Watercolor crayons and then blended using textile medium. I heat set and then added batting and backing. I used various colors of thread to create the lines in the leaves. I first outlined all the large leaves and then stitched to get the patterns. I wanted it to look more like leaves in life than a perfect leaf so pushed the fabric an manipulated it to add a more three dimensional look and feel. So parts of the leaves and stems pop out from the fabric. I added clear beads to simulate the water drops and a few crystal beads for more realistic water droplets. I used fabrico dye pens to add a drop shadow behind for even more dimension.
I think this is one of my favorite pieces. Wish my luck!
Labels:
art,
art quilt,
embellished,
fabric,
fiber,
flowers,
hand painted,
water color crayons
Thursday, August 26, 2010
Favorite Quote ATC
I am ahead of schedule for once. Maybe it is because my children went back to school and I have a moment to breathe. I almost feel guilty working on my art. I keep thinking that I should be doing projects around the house. But this two week break is my only time to myself for a very long time. So guilt be gone!!! LOL
So our next challenge was to create something about our favorite quote. Technically it isn't a quote but a line from a song by Jewel "Life Uncommon". Something about this line really struck a cord with me and so I went with it.
This is the first ATC created on paper. I used watercolor paper and added ink in yellow, pink and green. Then I added some gel medium to create some texture and when dry used a deep rose to tone down the colors. I fused a fabric heart onto the paper and added threads using the gel medium. I wanted the viewer to get the sense of emotions tying us up and keeping us from moving forward. I hand wrote the quote in and at the very last minute, I carved a little bird and stamped it onto each card. I seem to have a very yellowy looking card but it isn't quite that color - more golden. But a better representation than cards past!
Labels:
art,
ATC's,
embellished,
fabric,
hand painted,
ink,
mixed media
Subscribe to:
Posts (Atom)