Our trade this month was actually a theme I picked. Everyone seemed to really push the envelope on the theme Sticks and Stones! See the others work here http://heartisttradingcards.blogspot.com/
Mine was based on the fencing used by along beaches. The idea came to me while driving through the midwestern farm belt! A little bit of a leap but still keeps with the theme.
The sky was a hand dyed blue fabric while the sand was made from rust dyed fabric. The fencing was a piece for brown netting I had saved from a potato bag. I used black thread and free motion stitched wood posts and wire to keep the fencing in place. The rocks were made from white puffy paint. I tried to puff the paint without melting the plastic. It worked in some areas and not in others. I think it adds to the rustic quality of the piece. Then I used different inks to get the coloring in the rocks and finished with walnut ink overall. I also used it to create shadow effects. The final touch was using glitter glues in browns and blacks for the sandy texture.
I framed each by sewing around the outside edges and painting the edges with red gold fabric paint by Jacquard. I think that color was a perfect match for the rest of the card. I am much happier with this round than last months!
Showing posts with label hand dyes. Show all posts
Saturday, April 20, 2013
Monday, December 31, 2012
Gustavo, Georgie and Fib
I finally finished this piece and named it after my daughters three African fighting frogs. This piece has been in the works for over two years. I would get excited about it, work diligently and then hate it. So it would be put away until I would find it again while looking for something else. Up on the design wall, critique and then figure out what was going wrong with it. The last round was the fact I needed something in my underwater landscape. Enter the frogs.
I really love how this finally turned out. There are so many design techniques and materials that went into this that my hand would go numb typing them up for this post. Let's just say I am extremely happy with the results! Maybe I will enter it into the Celebrate Spring call for entries.
On to my next adventures. My one goal for 2013 is to finally put together a website. Another goal is to start entering my pieces into shows. I need to get back to art again.
| Closeup of one frog |
| Here is another closeup |
| Final finished piece |
On to my next adventures. My one goal for 2013 is to finally put together a website. Another goal is to start entering my pieces into shows. I need to get back to art again.
Labels:
art,
art quilt,
beaded,
colored pencils,
dyed,
embellished,
fabric,
fiber,
frog,
hand dyes,
hand painted,
hand quilted,
ink,
mixed media,
snow dyes,
water,
water color crayons
Friday, August 17, 2012
Sneak Peek
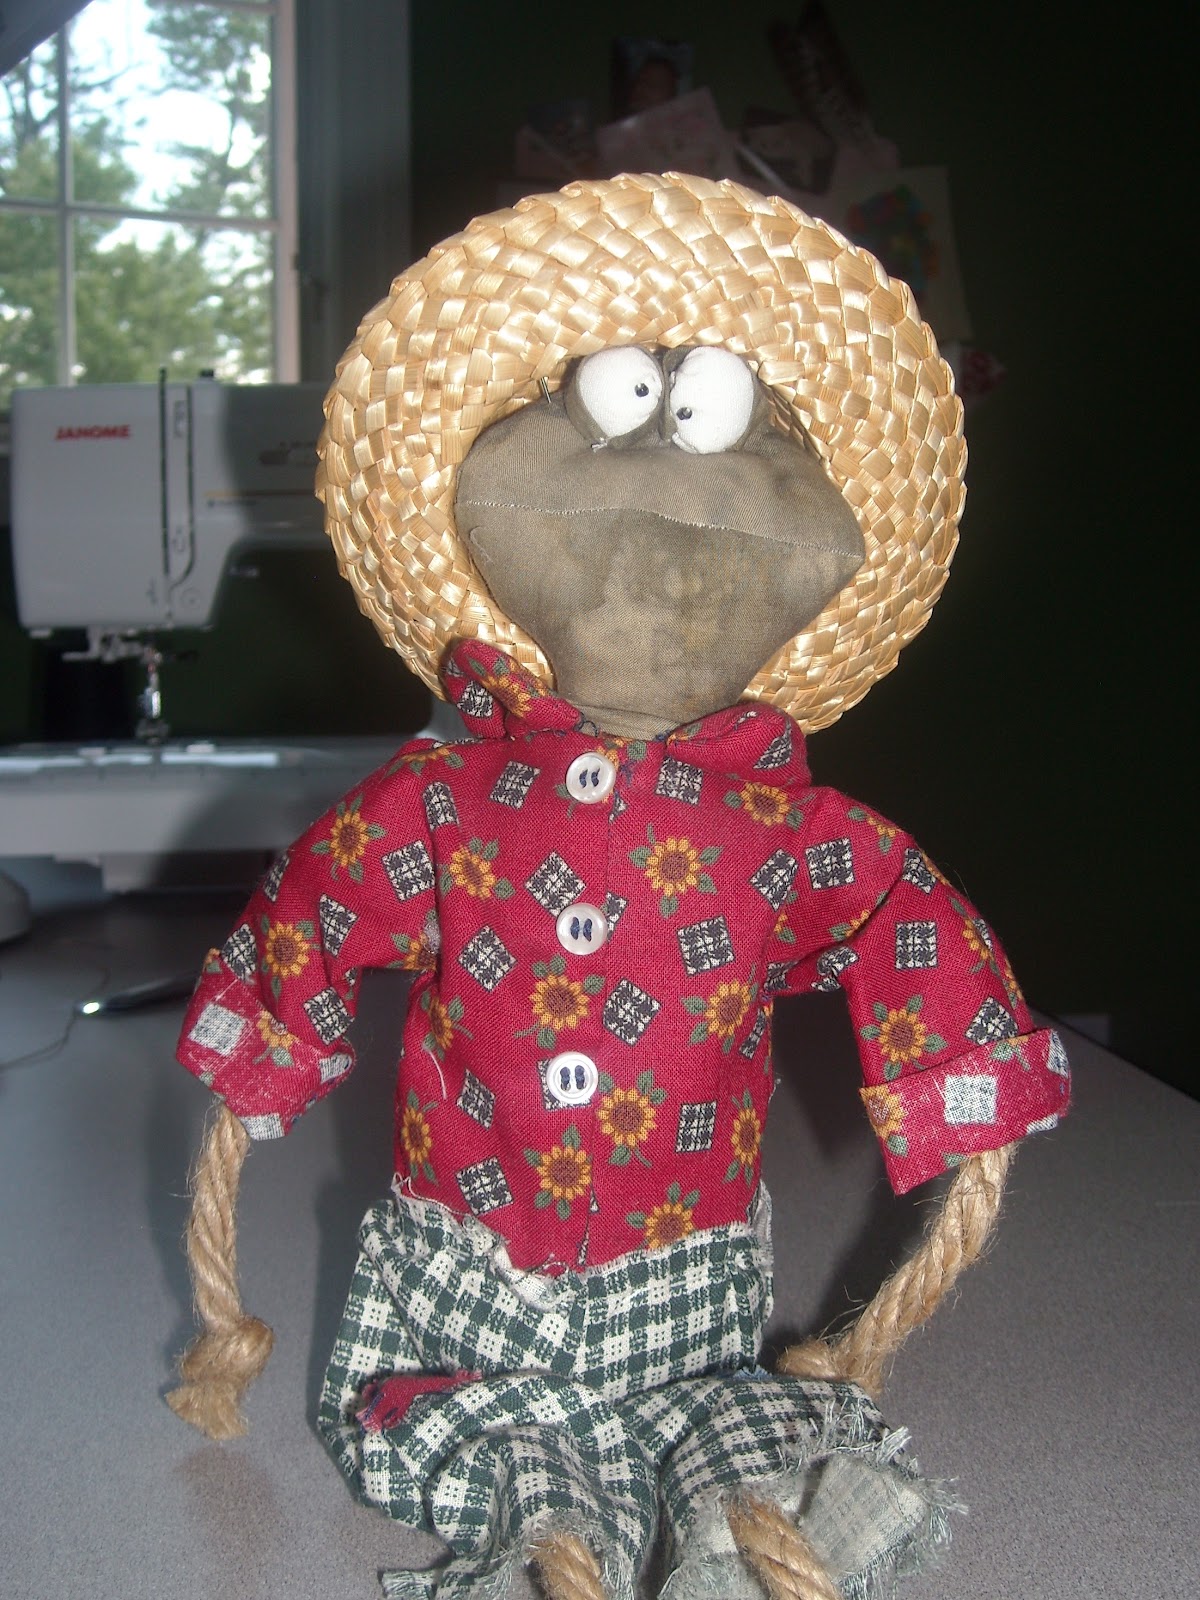
Not sure what is going on with me this week, but frogs have definitely been a mainstay in my creations this week. They are rather cute. This guy was from a pattern I bought a long time ago, started but never finished. It was supposed to be a present for my sister who is crazy for frogs. So if she wants this guy, she is going to have to come for a visit to get it! Ha ha!
He has a mate which is started. Should be another 10 years before I finish her though! Well maybe I can get it done by Christmas.
As a participant in a quilt art blog hop, I am submitting my current work in progress. To check out everyone else participating hop on over to Nina Marie's site
My last frog is actually a set of frogs. I pulled out a piece I had been working and and was in love with. Suddenly, after viewing it hanging up, I hated it. I pulled it off the design wall and buried it like I always do. When I get stuck on a project, I find that stepping away from it for a while will help me gain some perspective. This time it worked. I realized I did not have enough contrast and set about adding in more colors along with the contrast. I was happy when done but it was still missing something. Walking by my daughters african fighting frogs made me realize that was what was needed.
In second grade they learned about the life cycle of a frog and grew them into tiny little frogs. Once the unit was done, the kids were allowed to take some home. They were the size of a thumbnail. We took three which she promptly named Georgie, Gustavo and Fib. They are now the size of a large fist and need a bigger tank!
I spent an evening sketching the little guys. (I say evening because they move around quite a bit.) Once satisfied with the sketches, I traced them on some heavy vellum, cut them out and used it as a template to trace onto a greenish batik. The frogs have spots all over and I wanted a dimensional look, so I put a piece of batting underneath the frogs and free motion quilted around to create the patterning. Colors for the spots where done with fabric markers. The final part was to applique it onto the quilt. Just before sewing it closed, I added some stuffing inside to really pop them off the quilt.
I am loving this piece. I am finally ready to square up and finish it off! It feels so good to create something I love again!
He has a mate which is started. Should be another 10 years before I finish her though! Well maybe I can get it done by Christmas.
As a participant in a quilt art blog hop, I am submitting my current work in progress. To check out everyone else participating hop on over to Nina Marie's site
My last frog is actually a set of frogs. I pulled out a piece I had been working and and was in love with. Suddenly, after viewing it hanging up, I hated it. I pulled it off the design wall and buried it like I always do. When I get stuck on a project, I find that stepping away from it for a while will help me gain some perspective. This time it worked. I realized I did not have enough contrast and set about adding in more colors along with the contrast. I was happy when done but it was still missing something. Walking by my daughters african fighting frogs made me realize that was what was needed.
In second grade they learned about the life cycle of a frog and grew them into tiny little frogs. Once the unit was done, the kids were allowed to take some home. They were the size of a thumbnail. We took three which she promptly named Georgie, Gustavo and Fib. They are now the size of a large fist and need a bigger tank!
I am loving this piece. I am finally ready to square up and finish it off! It feels so good to create something I love again!
Labels:
art,
art quilt,
daughter,
dyed,
embellished,
fabric,
fiber,
frog,
hand dyes,
hand painted,
hand quilted,
ink,
water color crayons
Sunday, April 15, 2012
If April Showers . .
bring May Flowers, what do May Flowers bring? The pilgrims! I still remember that joke from my childhood! Corny but cute. So our latest trade was Rain. Rain as a color really stumped me for quite a while. Well until I realized that it really is clear and picks up the colors it lands on. So I used the idea of a driving rain against a window.
I used a hand dyed fabric I made a long time ago in blues, whites and a pale pink. Details were added with watercolor crayons and water. Once dry, more details were added with fabric markers and then free motion stitching in metallic blue. For the highlights and sparkle I used a scrapbooking product called Stickles in star dust (fancy term for off white!) That had to dry overnight. Additional dimension was created with markers in blues and some pinks. I knew it would be impossible to get the sparkle into the photograph but gave it the old college try. This was as good as it gets unfortunately.
Labels:
art,
ATC's,
fabric,
fiber,
hand dyes,
mixed media,
sharpie markers,
water color crayons
Monday, February 27, 2012
Key Lime Pie ATC
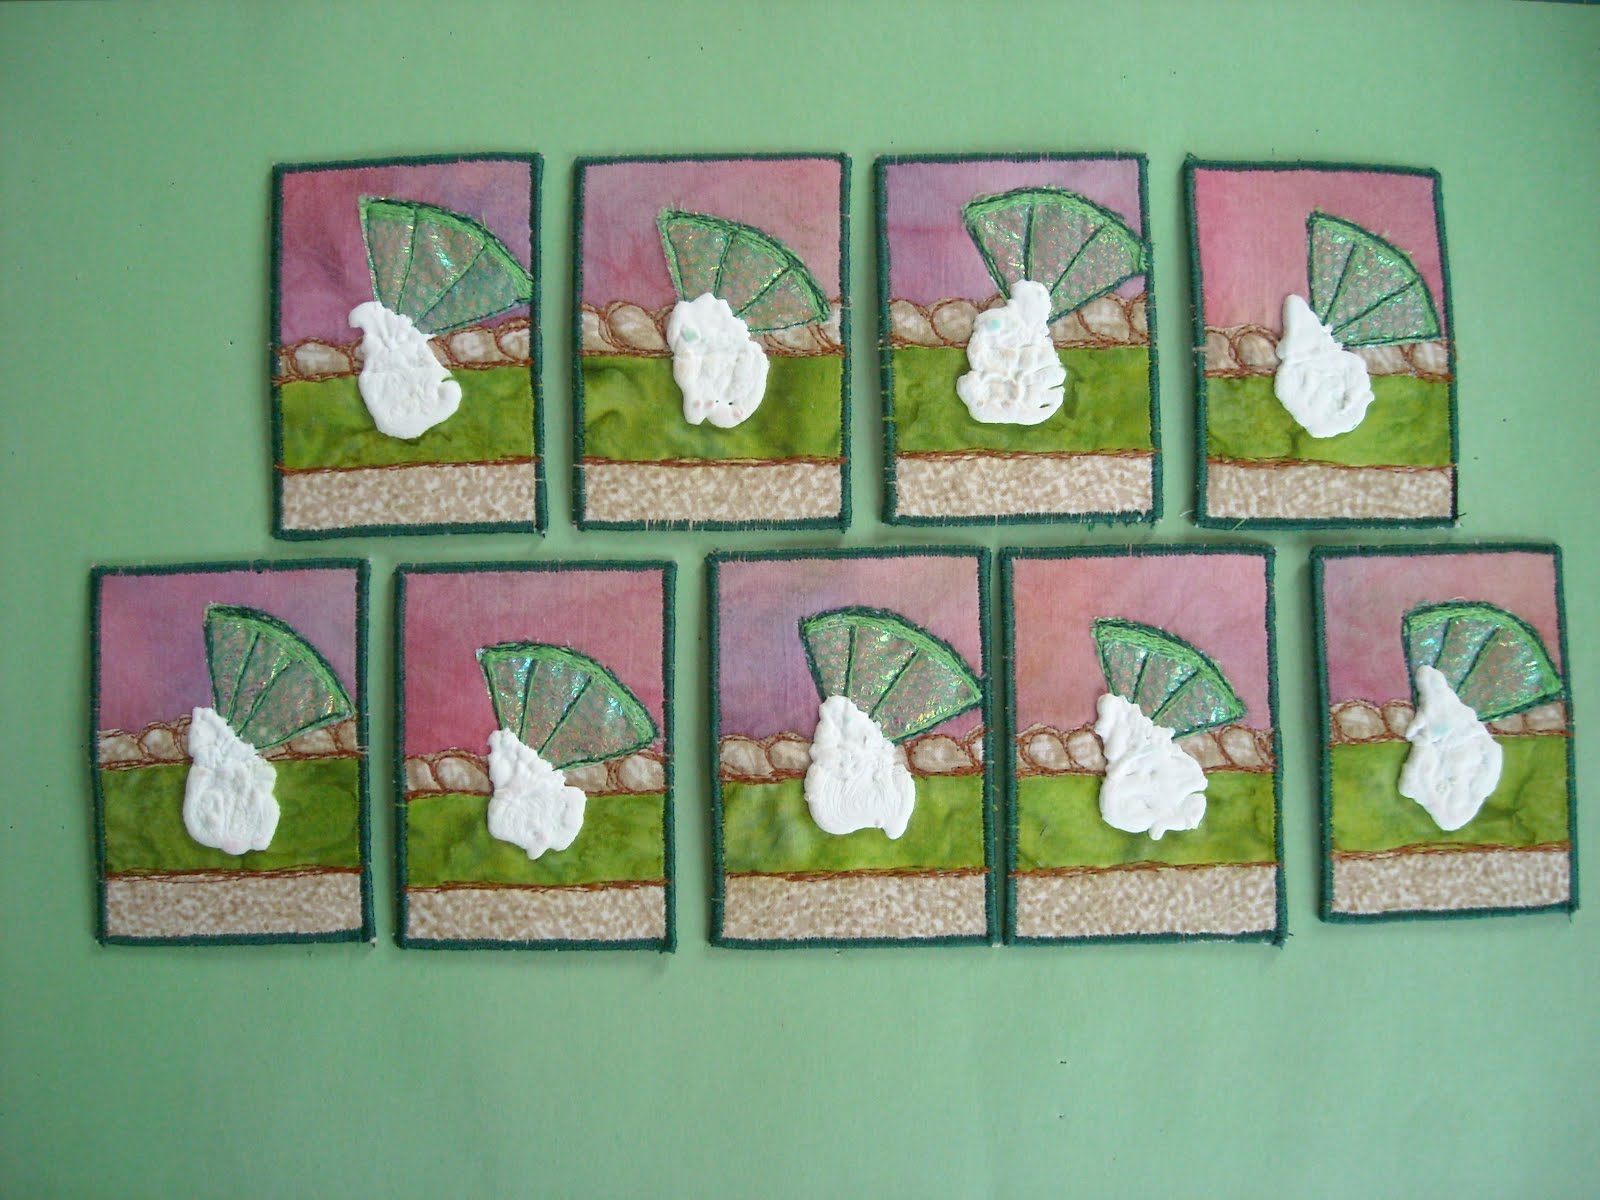
Our theme for this month was LIME. This year, we have deviated a bit from our usual theme and we will only be doing colors. I guess they were sick of my finding a way to make a tree out of every challenge! Just kidding. (But limes grow on trees . . . )
I constructed the pie using a hand dyed pink and purple fabric for background, lime batik for the pie and a cream and light brown for the crust. There was too much of a pattern on the bottom part of the crust so I used a brown dye pen to even it out a bit. I added detail to the crust by using a free motion stitch in rust to add another dimension. The lime was made from fusing a rainbow cellophane from a flower arrangement and green netting together. Free motion stitching in lime green added the details. I then quartered the circles so they would fit on each card. More detail was added using a dark green thread to stitch it to the card. The final piece was to use my favorite puffy paint to make whipped cream. Good thing I made extra pieces to test on because I ruined a couple when I was puffing up the paint!
See the other Lime pieces at Arts In the Cards blog!
I constructed the pie using a hand dyed pink and purple fabric for background, lime batik for the pie and a cream and light brown for the crust. There was too much of a pattern on the bottom part of the crust so I used a brown dye pen to even it out a bit. I added detail to the crust by using a free motion stitch in rust to add another dimension. The lime was made from fusing a rainbow cellophane from a flower arrangement and green netting together. Free motion stitching in lime green added the details. I then quartered the circles so they would fit on each card. More detail was added using a dark green thread to stitch it to the card. The final piece was to use my favorite puffy paint to make whipped cream. Good thing I made extra pieces to test on because I ruined a couple when I was puffing up the paint!
See the other Lime pieces at Arts In the Cards blog!
Tuesday, July 26, 2011
Death/Rebirth - Opposites Challenge
Time for the monthly posting of my ATC trade! See the rest here: http://artsinthecards.blogspot.com
This month was Opposites. I thought it would be an easy one to do but I ended up struggling with it. I was not feeling very creative as the day before this was announced, we learned of the sudden death of my BIL Paul. My husband was devastated as he had just lost his father 8 months prior. Events like this always gives us pause to contemplate the cycle of life and other things.
Driving home from the store, my attention was caught by a dead tree spiraling quite high into the sky. It was quite striking against the blue sky with fluffy clouds. I am sure it was a very stately tree with a very interesting past - kind of like my BIL. Below the tree, there were tiny trees, shrubs and flowers growing up all around the dead tree. So that became my theme - death/rebirth. Interesting how after death, other things show up to fill the void.


I used a fabric I dyed with blue dye and a flour paste resist. The trees are made from black and white puffy paint added on top of one another. At the base of the tree, I couched green yarn to create to shrubs and silk scraps are held in place with beads to create the wildflowers. I beaded some additional sprigs of orange flowers to add to the image.
Rest in Peace Paul Cox.
Your outrageous personality and quick wit will be dearly missed.
This month was Opposites. I thought it would be an easy one to do but I ended up struggling with it. I was not feeling very creative as the day before this was announced, we learned of the sudden death of my BIL Paul. My husband was devastated as he had just lost his father 8 months prior. Events like this always gives us pause to contemplate the cycle of life and other things.
Driving home from the store, my attention was caught by a dead tree spiraling quite high into the sky. It was quite striking against the blue sky with fluffy clouds. I am sure it was a very stately tree with a very interesting past - kind of like my BIL. Below the tree, there were tiny trees, shrubs and flowers growing up all around the dead tree. So that became my theme - death/rebirth. Interesting how after death, other things show up to fill the void.
I used a fabric I dyed with blue dye and a flour paste resist. The trees are made from black and white puffy paint added on top of one another. At the base of the tree, I couched green yarn to create to shrubs and silk scraps are held in place with beads to create the wildflowers. I beaded some additional sprigs of orange flowers to add to the image.
Rest in Peace Paul Cox.
Your outrageous personality and quick wit will be dearly missed.
Sunday, May 1, 2011
Spring - Kinda
Lot's of crazy stuff going on in my life right now! So I have a few things to post about. This is the latest of my ATC trading cards. Looking at them now, they really look so much like a set I did last year. I must have really liked that one!
The theme was in Just Spring based on ee cummings poem. I just didn't have anything springlike happening. We have had nothing but rain and overcast days. It has been depressing to say the least. Everyone has been just in a funk and it is well represented in my latest ATC's.
I used hand dyed fabric and did a rubbing on it with a leaf plate. It was boring. So I fused it to the peltex and cut to individual cards and stamped leaf prints using commercial and hand cut stamps in brown and light green. I really liked them at this point but then was at a loss on how to proceed. I just wasn't in a spring frame of mind. Finally I decided to just go with it and used fabric crayons and sequin waste to add in "flowers" in red, blue and yellow. I smeared on a sparkly glitter glue to represent the standing water. I heat set, then free motion stitched grasses as this seems to be the only thing growing right now. My single shot is a little blurry again. I think I may be having some problems with my camera. It is also tough to get good shots when the weather is so dark and dreary. But we are on our 2nd day of sunshine so things are looking more like spring! Finally!!
Thursday, December 30, 2010
Snow Dyeing Part 2
One of the blue range. This was mixing blue, another blue and a red purple.
This was a scrap of light green fabric but I suspect it was not 100% cotton. Well I figured that before dyeing but decided to do it anyway! I like the very subtle hints of color.
These two were done with a leaf green but I was almost out of the dye so it was not very strong. But I also added a yellow and blue. These pieces remind me of geodes for some reason.
This is Maddy and my favorite! It has a little bit of all the colors.
These all seemed to be sort of the same so I lumped them together.
And because I could, I added in some white lacy flowers. They remind me of snowflakes so I may have to find a use for them!
Sunday, February 14, 2010
Going Green ATC Trade
I am actually early on my next trade. It isn't due until March 1st but Hubby's birthday is next weekend and the weekend after, I have to go on a girl scout camping trip. So this was it for me to get them done. I am really excited how they turned out but my photography is not so great.


The background is a paper towel I used to soak up excess dye during my summer experimentation with daughter and friend. I thought the colors were cool so I kept them. They were perfect for this challenge. I stamped a fern type pattern on each with a hand cut stamp. Then machine quilted around to accent them. I added some left over angelina fibers and some green netting I had on hand from a lime bag. They make great grasses! I sewed over them with some thread to make blades of grass. I added some sequins and beads for a little extra something and then finished the edges. I am really happy with these and have 3 left over!
Monday, October 26, 2009
Stamps and such
I am trying to get back into a creative groove. School starting up for the kids has thrown my schedule into the twilight zone! So we are finally settling back into a new routine and I am trying to carve out some time for myself. Soccer was canceled on Saturday which gave me time to play catch up on projects! Yeah!
So I went to work on an idea I have had rolling around in my brain for a while. My inspiration was the fields of natural prairie grasses that grow so plentiful here in the midwest. I took pictures last fall (good thing as this fall has had nothing but rain!) I bought some fabric from my good friend Katherine Sands.

Well about a year ago I bought it! Anyway, I carved some stamps this weekend and played with them in my sketchbook to get my ideas down for the composition.

Not there yet but thought I would post and get some feedback.

This has a graduated background of blues and then I stamped the grasses in three colors. I added the other stamps and realized that I could do this as a piece near water and add reflections! Another avenue I hadn't considered.

This one was a simplified version of the different grasses. But I had sketched it in with colored pencils a while ago since I hadn't done the stamps yet.

This one was created like the first but on a previously painted background in my sketchbook. The colors are blending into the background so I need to add more darks. But this was just for ideas and working out everything.
The large stamp was of a teasel weed. Didn't realize it was an invasive plant until I was at a rest stop in Illinois and saw it posted on the wall! Yikes. I first noticed them last year and thought we were getting a cool thistle with some great flowers. All it did was turn brown.
So I went to work on an idea I have had rolling around in my brain for a while. My inspiration was the fields of natural prairie grasses that grow so plentiful here in the midwest. I took pictures last fall (good thing as this fall has had nothing but rain!) I bought some fabric from my good friend Katherine Sands.
Well about a year ago I bought it! Anyway, I carved some stamps this weekend and played with them in my sketchbook to get my ideas down for the composition.
Not there yet but thought I would post and get some feedback.
This has a graduated background of blues and then I stamped the grasses in three colors. I added the other stamps and realized that I could do this as a piece near water and add reflections! Another avenue I hadn't considered.
This one was a simplified version of the different grasses. But I had sketched it in with colored pencils a while ago since I hadn't done the stamps yet.
This one was created like the first but on a previously painted background in my sketchbook. The colors are blending into the background so I need to add more darks. But this was just for ideas and working out everything.
The large stamp was of a teasel weed. Didn't realize it was an invasive plant until I was at a rest stop in Illinois and saw it posted on the wall! Yikes. I first noticed them last year and thought we were getting a cool thistle with some great flowers. All it did was turn brown.
Monday, April 27, 2009
Experimentation
So I went to IQA and bought a few things to play with in regards to fabric. The one thing I have actually had time to use was tannin. I bought it from Lois Jarvis of RustTex fame. After you start rust dyeing your fabric, you add the tannin to get the grays into the fabric. I didn't let my fabric rust dye as long as I usually do as the weather has been crazy? 25 degree temperature swings, rain and sunshine. So I let it rust for the afternoon and then added the tannin. I let it sit overnight because I forgot about it and it was raining again! Anyway, here are the results:


And of course I had to add an update of the puppy who is already 12 weeks old! He is quite content to hang out on my son Patrick. Aren't they cute?
Thursday, March 19, 2009
Play day!
I had a day off on Tuesday and it was a glorious 74 degrees! Woo-hoo!! Totally unheard of this time of the year. My friend Katherine Sands sent me the Color By Design by Ann Johnston that I ordered from her site. I was so inspired. Of course I didn't have all the materials I needed yet. I found old dye laying around and just decided to go for it. The fabric is white cotton and I had soaked it in soda ash and let it dry naturally. The dyes were from an old tie dye kit so I wasn't holding out a lot of hope. I was thoroughly surprised with the results and so excited about the possibilities.
First I squirted the dye on to the fabric and then used a brush to smoosh the dye around. I let it sit for about 8 hours and then washed it.

This has an underwater feel to it. Really finding that a lot in my work lately - ironic as I can't swim.

This reminds me of a sunset swamp, water and misty trees. Really excited about these pieces.
First I squirted the dye on to the fabric and then used a brush to smoosh the dye around. I let it sit for about 8 hours and then washed it.
This has an underwater feel to it. Really finding that a lot in my work lately - ironic as I can't swim.
This reminds me of a sunset swamp, water and misty trees. Really excited about these pieces.
Wednesday, March 11, 2009
Urban Decay-Fragments Challenge Piece
I can't believe I am finished with this piece already! Don't you just love it when work flows out of you so easily. And I am happy with the result which is unusual for me as I tend to hate it after working on it for so long.

I used rust dyed fabric and then painted it with orange and turquoise textile paint. Then I stenciled the tree in green and added a dark brown-black horizon line. I FMQ the entire piece and went back in with shiva paint stiks and dye sticks to add more interest and detail.

Detail 1

Detail 2

I used rust dyed fabric and then painted it with orange and turquoise textile paint. Then I stenciled the tree in green and added a dark brown-black horizon line. I FMQ the entire piece and went back in with shiva paint stiks and dye sticks to add more interest and detail.

Detail 1
Detail 2
Thursday, February 26, 2009
Quick Project
Between girl scouts, helping my son with homework (ISATS are coming up) kids projects, working and trying to get some challenge pieces done - I did manage to get a small piece finished. Pamela Allen's husband had medical issues requiring surgery on his heart. A. Carole Grant organized a group of us to make some "lovies" for her. I forgot about it - well put it on the back burner thinking I have all this time. She sent me an email reminder and I couldn't believe that February is almost gone!!
I jumped into action and had it completed and mailed in less than a week. That must be a record for me! Anyway, I am posting it here so you don't think I have been a total lazy slacker.

I used hand dyed fabric backing and then used left over flowers from my Voice that is Great Within Quilt. I sewed them in place and beaded the centers then stitched in flowers throughout. I found some flower sequins to add a little bling. I have to say I like how this turned out. Flowers always make people feel better. As usual, the picture doesn't do it justice.
I jumped into action and had it completed and mailed in less than a week. That must be a record for me! Anyway, I am posting it here so you don't think I have been a total lazy slacker.
I used hand dyed fabric backing and then used left over flowers from my Voice that is Great Within Quilt. I sewed them in place and beaded the centers then stitched in flowers throughout. I found some flower sequins to add a little bling. I have to say I like how this turned out. Flowers always make people feel better. As usual, the picture doesn't do it justice.
Labels:
art,
art quilt,
beaded,
embellished,
fabric,
fiber,
flowers,
hand dyes,
hand quilted,
water color crayons
Sunday, January 11, 2009
An Honorable Mention Award!
Cyber Fyber opened on January 8th. Ellen Kochansky juried the CYBER FYBER traded fiber ATCs and fiber Postcards and I received an honorable mention! I am so excited!
Labels:
art quilt,
fabric,
fiber,
hand dyes,
hand painted,
mixed media,
postcards
Friday, November 7, 2008
Garden Art Quilt


This is my contribution to a project done for a very special lady - Ms. Anne Copeland. She founded a non-profit organization to help promote textile arts and people with disabilities doing art. She is tireless in her effort and for that, we are all especially grateful. You can visit her group at http://www.fiberartsconnsocal.org/gallery.html A group of people made little mini art quilts for her. We put them into a scrapbook album so that she could look through them whenever she needed inspiration. I was in charge of the cover.
I dyed the fabric using setacolor dyes. When dry, I heat set and then stamped a fern image through the background in three different colors. I then outlined each of them to help pull out the details a little more. Annie loves flowers so I decided to make her a little garden she can enjoy year round. I embroidered various flowers around the front cover and also added sequins and beads for tiny flowers. I just loved how it turned out.
Sunset

Here is the second piece I managed to finish for the Stay at Home Challenge for AAQI.
Hand dyed fabrics, hand and machine quilted. As usual, picture doesn't do it justice. The colors are much more vibrant. Played with it in photoshop but this is as good as it is going to get apparently. Oh well.
Labels:
art quilt,
fabric,
fiber,
hand dyes,
hand quilted
Friday, October 24, 2008
Black and White Challenge
I finally get to post some pieces that I have been working on for the last 6 months! So exciting. I joined up to do Annie Copeland's "Your World in Black and White" challenge. We had to create a piece using only white, black, silver and gray. I thought it was going to be easy for me but it really was a struggle to get the lights, darks and mid tones.


In The Silence I Have Seen Him. This was an image I had in my head of an angel. It is done as if you have turned around and caught him in the corner of your eye. The brilliance of the light surrounding him makes him almost impossible to see clearly. It was created on white cotton fabric, sketched and then painted with dye for the basic design. Then I quilted the piece and finished with shiva paintstiks to add details and lights and shadows. I think this may be the best piece I have ever done in fiber.
This is my second entry. Styx and Stones. I created this piece from my sketchbook process. I had been playing around with tracing paper sketches from small sections of photographs. I then blew them up about 120% and glued the patterns/designs to my sketchbook and created a sketch from them. I thought that it would translate to fiber perfectly. It did but my photography does not do it justice.


This piece is about 60" wide by 30" high. It was hand painted with dye on white cotton then various black and gray fabrics were fused on to create the rocks. The rocks were FMQ. The boxes are white cotton, framed in black binding and the styx are black cotton fabric tubes hand sewn on. The water was hand quilted with silver thread. The highlights were added with white shiva painstiks.


In The Silence I Have Seen Him. This was an image I had in my head of an angel. It is done as if you have turned around and caught him in the corner of your eye. The brilliance of the light surrounding him makes him almost impossible to see clearly. It was created on white cotton fabric, sketched and then painted with dye for the basic design. Then I quilted the piece and finished with shiva paintstiks to add details and lights and shadows. I think this may be the best piece I have ever done in fiber.
This is my second entry. Styx and Stones. I created this piece from my sketchbook process. I had been playing around with tracing paper sketches from small sections of photographs. I then blew them up about 120% and glued the patterns/designs to my sketchbook and created a sketch from them. I thought that it would translate to fiber perfectly. It did but my photography does not do it justice.


This piece is about 60" wide by 30" high. It was hand painted with dye on white cotton then various black and gray fabrics were fused on to create the rocks. The rocks were FMQ. The boxes are white cotton, framed in black binding and the styx are black cotton fabric tubes hand sewn on. The water was hand quilted with silver thread. The highlights were added with white shiva painstiks.
Labels:
art quilts,
dyed,
fabric,
fiber,
hand dyes,
hand painted,
hand quilted,
sketch
Tuesday, July 1, 2008
Watercolor Pencil on Fabric
I finally had a moment of free time. Well moments strung together to create something pretty cool. I was playing with the macro button on my camera because it was raining on and off. My orange daylilies were blooming so I decided to take some pictures. Wow! What a cool feature on my camera. Even better because I figured out how to use it. So I decided this one would be gorgeous as a fiber piece.

Original picture printed on a laser printer.

Materials - white cotton fabric, watercolor crayons, my picture for reference and a paintbrush. I didn't add the water because knowing me, I would spill it before starting. Not cool!

The flower sketched in with the watercolor crayons.

Fun part! I dip my brush in the water and start painting over the drawing. Some areas blend and others stay put. Once I was finished, I put it outside to dry. It is nice and sunny and hot so it dried very quickly! When it dries slowly, the colors migrate into one another a lot more.

Thread painted and then puffy paint to create the flower centers. I thread painted with a fire engine red thread for the petals, added a wine purple and a light blue to pull out more details. After the puffy paint dried, I heated it up to puff it. I painted them with dye pens and added shadows. The "pollen" was made with puffy velvet in yellow and then colored with orange dye pens.

And here is the final piece! I finished the edges with satin stitching in the same fire red color. I love how this turned out. I have to try a few more I think!
Original picture printed on a laser printer.
Materials - white cotton fabric, watercolor crayons, my picture for reference and a paintbrush. I didn't add the water because knowing me, I would spill it before starting. Not cool!
The flower sketched in with the watercolor crayons.
Fun part! I dip my brush in the water and start painting over the drawing. Some areas blend and others stay put. Once I was finished, I put it outside to dry. It is nice and sunny and hot so it dried very quickly! When it dries slowly, the colors migrate into one another a lot more.
Thread painted and then puffy paint to create the flower centers. I thread painted with a fire engine red thread for the petals, added a wine purple and a light blue to pull out more details. After the puffy paint dried, I heated it up to puff it. I painted them with dye pens and added shadows. The "pollen" was made with puffy velvet in yellow and then colored with orange dye pens.
And here is the final piece! I finished the edges with satin stitching in the same fire red color. I love how this turned out. I have to try a few more I think!
Subscribe to:
Posts (Atom)