Thursday, December 30, 2010

Snow Dyeing Part 1


I have always wanted to try this technique but never had the time or thought it was beyond my capabilities. I am not a dyer or a patient person so that does cause problems. But snow was going to be melting because temps are rising into the 50's with rain and thunderstorms - in December in Chicago???!!! I know, crazy right? Couple that with my 9 year old daughter telling me she's bored and I now have the guts to try this out.


So we rounded up some white t-shirts and scraps of white fabric that I had on hand and off we went. First I soaked everything in the soda ash for 20 minutes or when I remembered it again - whichever came first. Then I put them in the freezer. I read that somewhere, yes I did do some research before starting. Now I get to put the girl to work and she was very happy to do so. She is packing snow on each of the containers and then had a break to chomp on some of the ginormous icicles forming due to the big thaw starting.


The three containers on the right are the t-shirts and I let Maddy "design" them. She loves this part. She always puts so many colors together I am afraid she will get mud but she always gets astonishingly beautiful pieces! Here they are:


The last is a fabric scrap I dyed using fushia, red and yellow. I ended up washing these out last night after all the snow had melted. Someone told me to let them sit 24 hours and then wash. So I left the blues and greens "cooking" for the full 24 hours. I have them in the washing machine now and will post a little later.

Monday, December 27, 2010

Faux bricks


I found the photos on my iPad. I hadn't transferred them over to my main computer. This was a really big project and took far longer than I had planned. It' s been a while since I've done a project this big.

My neighbors wanted to do a faux brick wall in their formal living room. The side wall was about ten feet and sloped down to eight. The back wall was ten feet high and I don't want to know the width. This technique is sponged on in four colors. The first takes the longest as it has to cover almost all the wall. The next two are time consuming and the final is a breeze as you just hit a few areas. The hardest part was measuring out the bricks and keeping them level and the right size. The process is a little forgiving. Finally, outline each of the bricks in the mortar color and then highlight and shadow each brick. I was exhausted when done but what an awesome looking wall if I do say so myself!

Faux Stone Wall


So I have been back to doing a little faux finishing - this time for a neighbor. I did a brick wall a few months back and will have to upload the photos when I find them! But they were having a party for the holidays and the whole house was being painted and cleaned so they wanted to know if I could slip in and paint this wall in the middle of all the chaos. Sure, why not! I took a few quick shots right after it was finished and could only do the top part of the wall because they had all their stuff in the room I was painting.
I will try to get another full shot later when they have a few moments. There is an elk head that actually hangs on the wall. This should make a very nice backdrop for him.

Thursday, December 23, 2010

Trashin' the Mailman ATC


Our latest trade was to use the junk mail that we receive and create some ATC's. This gave me a chance to try out a cool new technique for image transfer. Take a color brochure and place packing tape over the image. Overlap if you need to. Then rub the whole image to make sure you get a good print. Once that is done, flip over to the backside, run some sandpaper over it to rough up the surface, then use water to remove the paper backing. This will leave you with a print of the image on the packing tape.
I glued this to watercolor paper that had been painted in pinks, blues and purples to match the colors from the brochures. I used gel medium to adhere it. I then pounced some interference blue over the fronts, then stamped with tiny snowflakes in dark blue. Once that was dry, I added another stamp in white in a random pattern and outlined in dark blue marker.
For the big snowflake, I cut out 2 snowflakes from the brochure and then made photocopies in a larger size. I made extras in case I screwed up ; )
I used glitter glue on top of the snowflakes to make them sparkle then cut each one out when the glue dried. I glued one to each card and added Holiday 2010 from another brochure.
Finally I added eyelets and funky yarn to frame the entire piece. They were hard to photograph as they are very shiney.

Check out our ATC blog to see all the other pieces for this challenge:
http://artsinthecards.blogspot.com/

Saturday, December 4, 2010

Typography


Our latest ATC trade was called Typography. We had to incorporate type or letters in any way, shape or form. Of course I immediately decided to use PCOX for my project. It was perfect!

I used watercolor paper and stamped the letters with embossing liquid for the p's and o's and then sprinkled on glitter emobssing powder. Once it was dry, I hit it with a heat gun. The sparkles stayed! Then I stamped c's for the eyes in the peacock feathers and x's were used to create the feet. I painted the feathers with metallic acrylic paints and drew in final details with a black pen. Some of the glitter went on the feet so I am just saying it was nail polish! LOL

Sunday, October 17, 2010

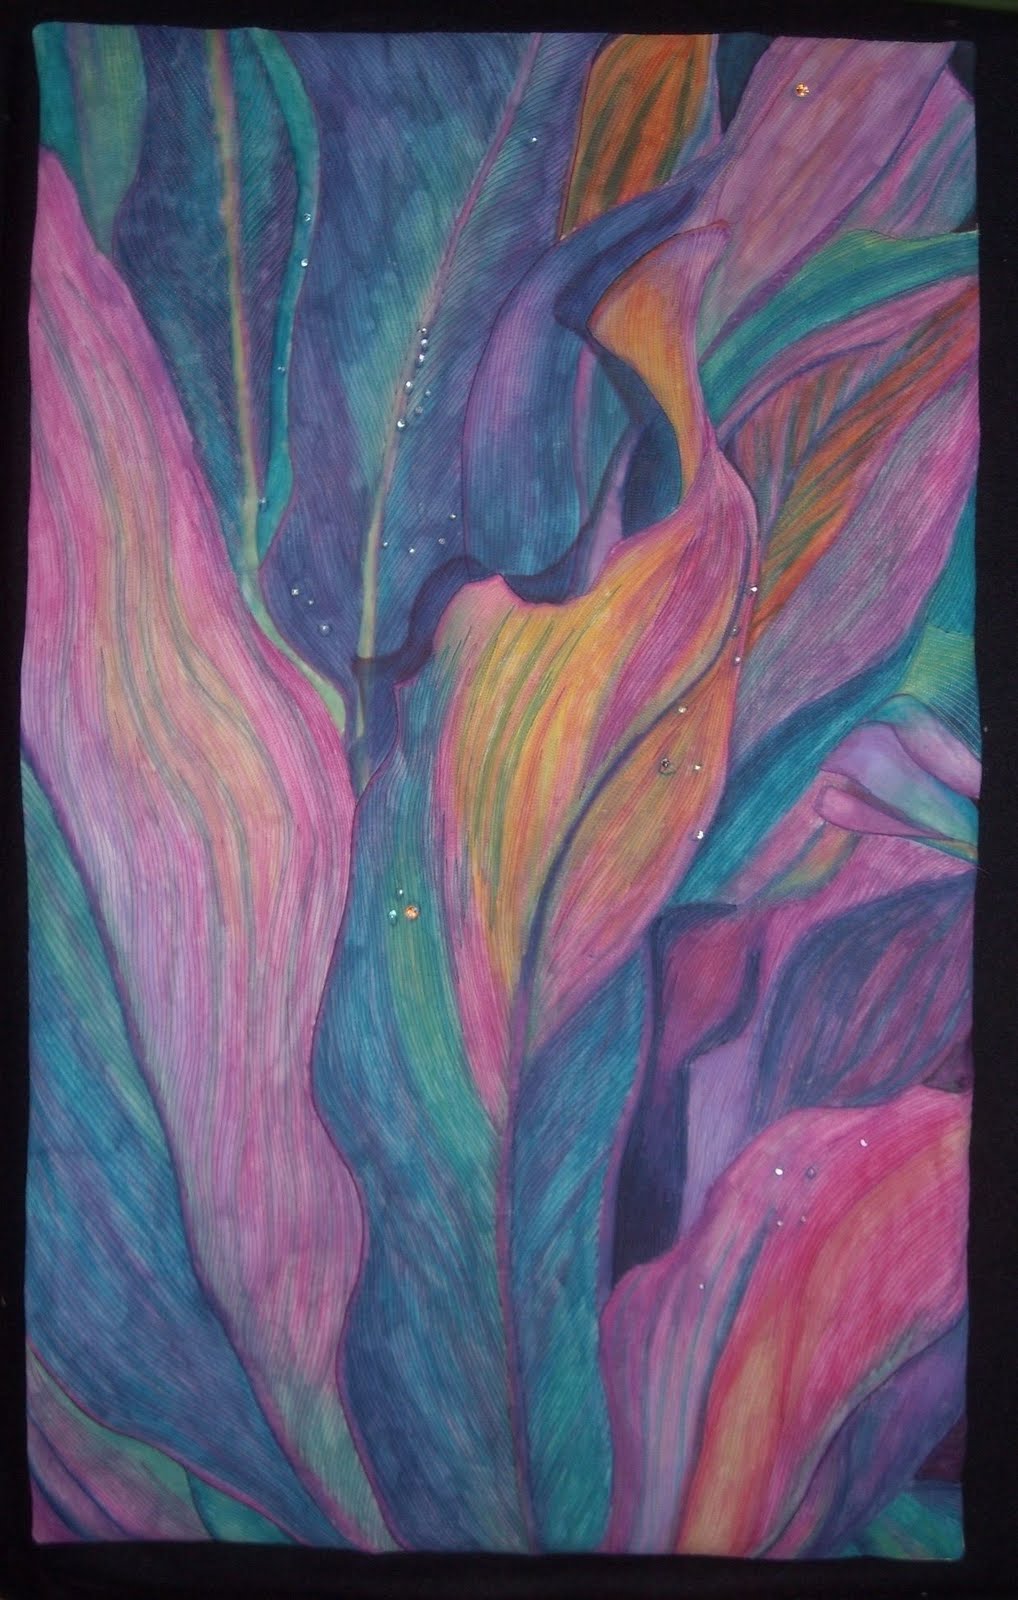
Florida Flora

I can't believe I haven't posted anything since end of August. So sad but I have been busy. Well busy with my kids going back to school, going back to work, my kids various social engagements and soccer season. But I did manage to get a piece done and entered into the Road to California show.


I started out using a photo I took while on vacation in Florida last year. I sketched out the picture using Neocolor Watercolor crayons and then blended using textile medium. I heat set and then added batting and backing. I used various colors of thread to create the lines in the leaves. I first outlined all the large leaves and then stitched to get the patterns. I wanted it to look more like leaves in life than a perfect leaf so pushed the fabric an manipulated it to add a more three dimensional look and feel. So parts of the leaves and stems pop out from the fabric. I added clear beads to simulate the water drops and a few crystal beads for more realistic water droplets. I used fabrico dye pens to add a drop shadow behind for even more dimension.
I think this is one of my favorite pieces. Wish my luck!

Thursday, August 26, 2010

Favorite Quote ATC


I am ahead of schedule for once. Maybe it is because my children went back to school and I have a moment to breathe. I almost feel guilty working on my art. I keep thinking that I should be doing projects around the house. But this two week break is my only time to myself for a very long time. So guilt be gone!!! LOL

So our next challenge was to create something about our favorite quote. Technically it isn't a quote but a line from a song by Jewel "Life Uncommon". Something about this line really struck a cord with me and so I went with it.


This is the first ATC created on paper. I used watercolor paper and added ink in yellow, pink and green. Then I added some gel medium to create some texture and when dry used a deep rose to tone down the colors. I fused a fabric heart onto the paper and added threads using the gel medium. I wanted the viewer to get the sense of emotions tying us up and keeping us from moving forward. I hand wrote the quote in and at the very last minute, I carved a little bird and stamped it onto each card. I seem to have a very yellowy looking card but it isn't quite that color - more golden. But a better representation than cards past!